This guide explains how to get started with Sentry with a dex-enabled vending machine.
It is intended to provide a high level overview of the essential process – for more detail, see other guides.
Get a machine to communicate with Sentry #
To get started, get a machine to communicate with Sentry.
Getting your vending machine to communicate with Sentry will depend on the modem / credit card reader on the machine.
Set up your machine from the communication device in Sentry #
The next step is to set up your machine in Sentry. The recommended way for setting up vending machines is to set them up after a communication device has dialled into Sentry.
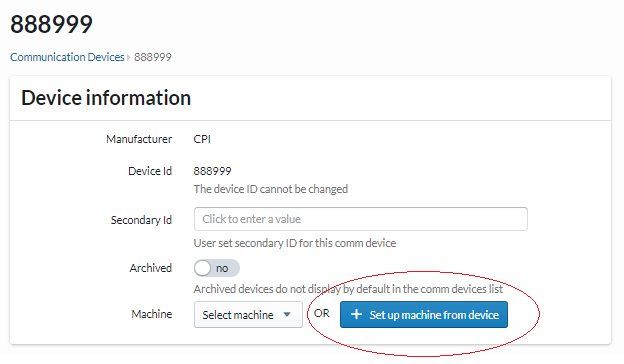
To do so, navigate to your communication devices page: https://app.sentryvend.com/commdevices.
Once your vending machine has communicated with Sentry, it should appear in this list. Once it appears, you will see it identified by a unique modem number. Click on this number to take you to the detailed communication device page.
From this page, press the button ‘Set up machine from device’. This will take you to the machine creator form.
On the machine creator form, enter information about the vending machine, such as a unique asset ID. Bear in mind the following:
- Asset ID: Each machine must have a unique asset ID, for example, ‘Machine-1’.
- Route: For the first machine you set up, add a route for the machine. A route is just a collection of machines. Example types of routes might be:
- Based on a driver (for example, ‘John’s route’);
- Based on a geographic region (for example, ‘North route’);
- Generic in nature (for example, ‘Route 1’).
- Location: It is recommended to create a location for a machine when creating the machine. Press the ‘Create new location’ button and complete the location creator form to create a location for the machine.
Once you have filled out the machine creator form, press ‘Create machine’ to submit the form. This will create the machine.
Dex planogram layouts #
If you set a machine up from a communication device which has had one or more dex communications, it will automatically be assigned a planogram dex layout.
To view the planogram dex layout, on a machine page, click on ‘Dex view’:
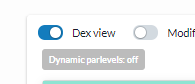
When dex view is enabled, you can click on selections in order to enable or disable them. This should be done when a machine reports more selections than it uses.
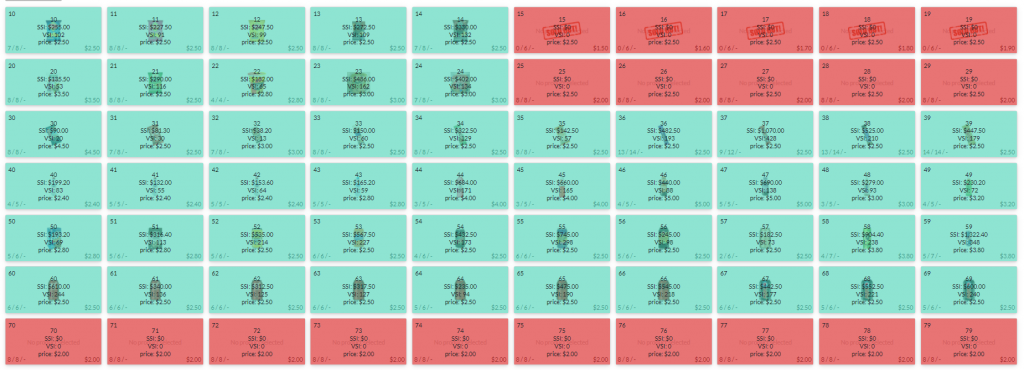
Filling the planogram with products #
Once the dex layout of the machine has been set, you can insert products into the selections. To do this:
- Click on a selection;
- On the edit panel on the right, search for the product you want to add; and
- Click on the product.
It is also possible to drag and drop products from the right-side edit panel directly onto the planogram.
Note: if you do not have any products in your product database, first go to the global product library, and add products to your database from there: https://app.sentryvend.com/global-product-library.
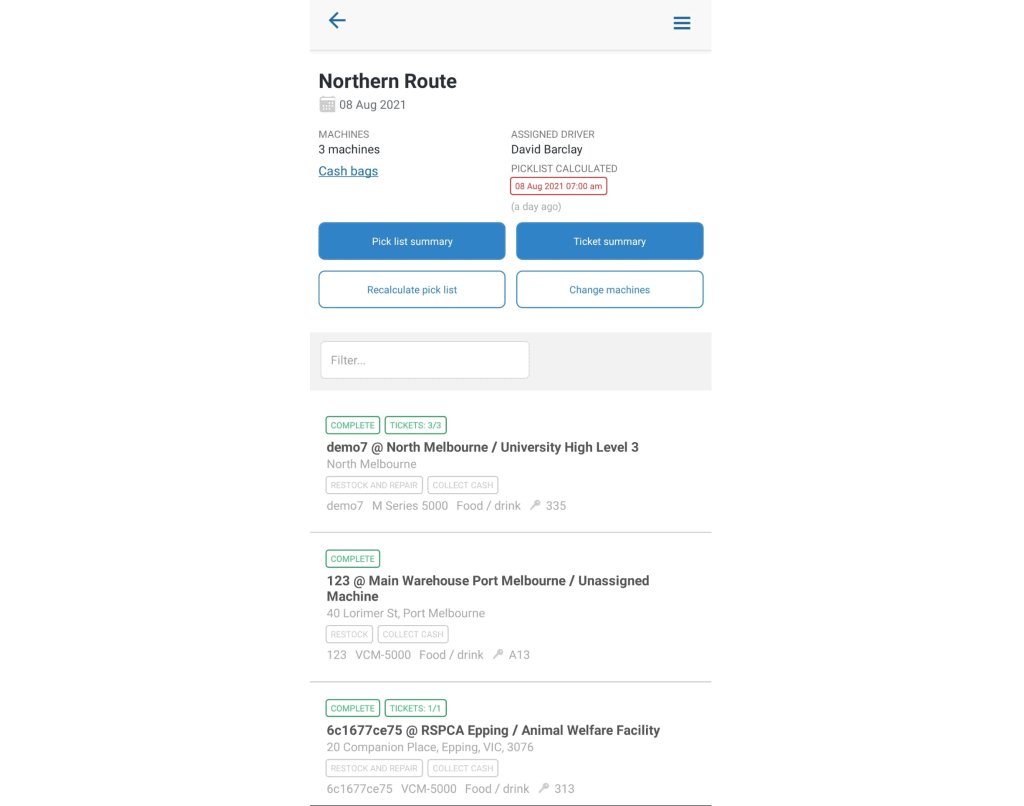
Planning a service run #
In order to service machines, you must first plan a service run. Planning a service run allows you to select which machines to service, and generate a picklist for those machines.
To plan a service run, hover over the ‘Routes’ menu at the top of the page, then hover over the route that you want to plan a service run for, then press ‘Create service run’:
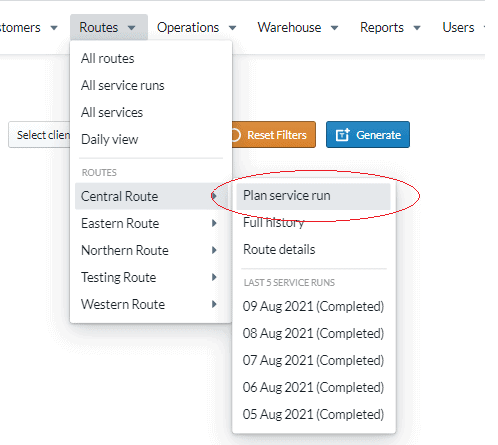
This will open the service run creator form.
In the service run creator, there are two required fields to create a service run:
- A date for the service run; and
- Machines you want to service.
To set these, click on the checkboxes under ‘Planned’ to select machines which you would like to be planned for service.
Click on ‘Select a date’ to select the date for the service run.
These are shown in the following screenshot:
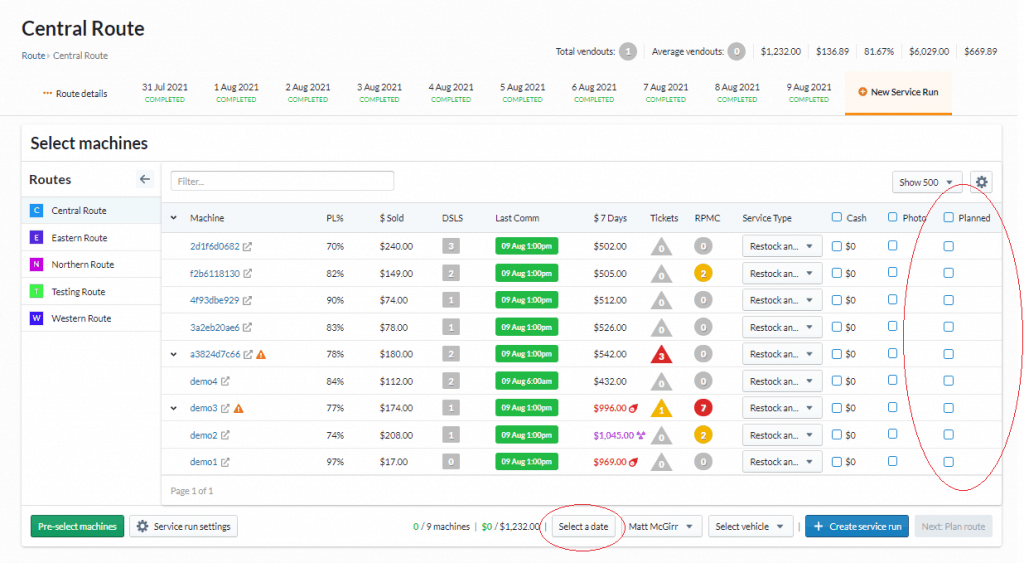
Once you have selected at least one machine, and a date, you can then create the service run by pressing ‘Create service run’.
Completing a service run #
Service runs are completed using the SentryMobile app. You can download the SentryMobile app here:
Android: https://play.google.com/store/apps/details?id=com.grt.sentry
iPhone: https://apps.apple.com/au/app/sentry/id1484751651
Once logged in, you will see your created service run. Clicking on it will show the machines in your service run: