Sentry allows you to create different promotions that can be added to micro markets. Once a campaign is set up, Sentry will automatically apply it to purchases made at the market.
This guide explains how to create one using Sentry.
There are two elements in Sentry that you will have to set up:
- Promotions
- Campaigns
Promotions #
A promotion in Sentry details the parameters and effects of the promotion you want to set up.
Setting up your promotion is the first step in the process (that is, you will need to have a promotion created before you can create a campaign).
To start, go to this URL: https://app.sentryvend.com/promotions.
Alternatively, you can look for the ‘Promotions’ tab in the drop-down menu under ‘Markets’ in the Sentry navigation bar.
Then select the ‘Add Promotion’ button in the top right corner.
You will then see the promotion creation view.

First, choose a name and description for the promotion.
Note: It may be helpful to include information such as the date, the type of promotion, if it’s for a particular client, and any other details that will help distinguish the promotion here.
Next, you must select the conditions under which the promotion will apply. Sentry will check each purchase made at the kiosk to see if it meets the conditions. Once these conditions are met, Sentry will apply the promotion to the customer’s purchase. This could include if the customer buys a certain number of items or if they purchase a particular item type.
Select however many items need to be purchased, as well as which products the promotion will be applied to.
Next, select the effects you want to apply. The effect is what happens when the promotion is applied to a basket that meets the conditions, such as 20% off one item or a fixed price of $10 for the whole basket.
You can have the promotion apply to the customer’s ‘Whole basket’ or just the ‘Condition items’. A promotion where customers get 20% off their purchase, for example, would be applied to the whole basket, whereas a promotion where a particular item is 35% off would just be applied to the condition items. A ‘Custom’ effect is used less often, but may be useful for more complex effects, like if you wanted to exclude certain items from the promotion.
Now click ‘Create promotion’ and the promotion will now be added to Sentry.
From here you can add an image to the promotion which will be displayed on the kiosk screen when it’s not in use. This is how customers will be informed about any promotions that are in place at their micro market.
Note: Make sure the promotion image matches the resolution of the kiosk screen, Sentry’s kiosks being 1080×1920.
You can also edit the promotion at any time if changes need to be made by clicking on the required promotion on the ‘Promotions’ page in Sentry.
Campaigns #
A campaign tells Sentry where and when to apply the promotion.
Once your promotion is ready, now it’s time to set up your campaign.
To start, go to this URL: https://app.sentryvend.com/campaigns.
Alternatively, you can look for the ‘Campaigns’ tab in the drop-down menu under ‘Markets’ in the Sentry navigation bar.
Once there, select the ‘Add campaign’ button in the top right corner of the screen, and the campaign creation view will pop up.
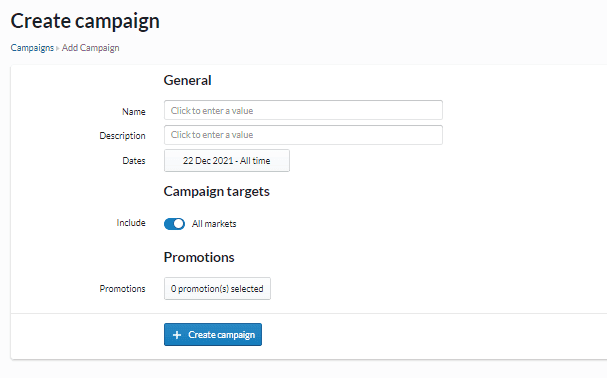
Once again, choose a name and description for your campaign.
Then select what dates you wish the campaign to run for.
Then choose what markets you want the campaign to be run at. You can select all markets or just a selection.
Then choose the promotion you want to apply, in most cases this will be the one you just created.
Note: You can also apply more than one promotion if need be, and Sentry will alternately display the promotion images on the kiosk screen every 10 seconds.
Then click ‘Create campaign’, and the campaign will be added to your campaigns in Sentry.
Sentry will automatically run the campaign during the dates you have selected.
Note: You can also apply more than one campaign to a market simultaneously, and Sentry will still cycle through the promotion images every 10 seconds.
Like promotions, campaigns can be edited at any time after creation.
Note: If you need to pause the campaign at any time, just select it from your list of existing campaigns in Sentry and click the ‘Pause’ switch.

Example #
Let’s create a promotion wherein if you buy two bottle of Coke, the price will be $5.
First, add a promotion on the Promotions page on Sentry.
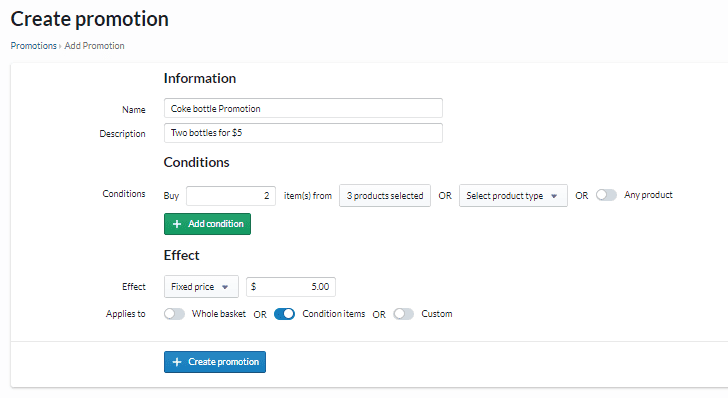
First, choose a name and description. In this case, the name is ‘Coke bottle Promotion’ and the description tells us what the promotion does.
In the conditions field, select that the customer has to buy 2 items out of the selected products, in this case it is bottles of Coke.
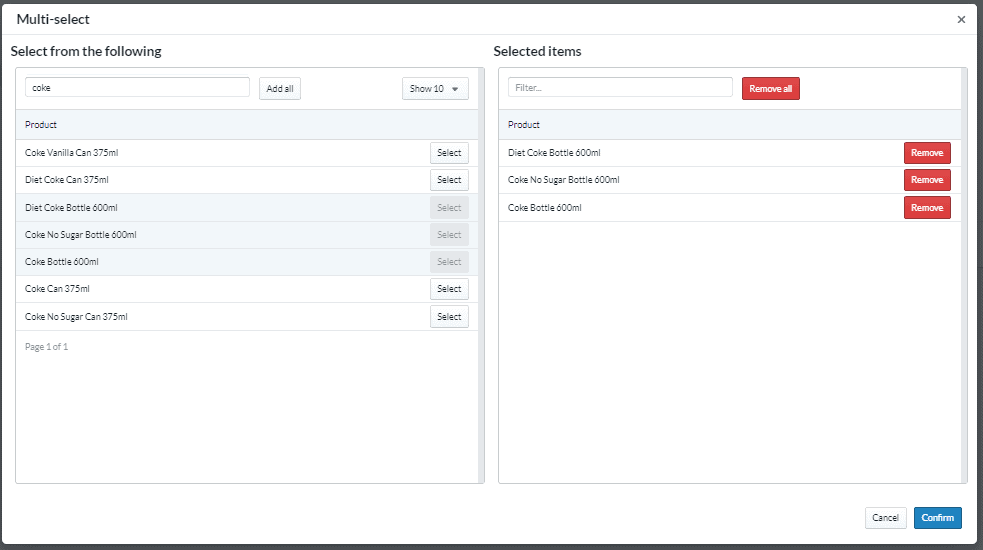
When selecting products, all the products in your library will appear on the left panel. Scroll or search for the products you want to apply the promotion to, and click ‘Select’. They will then be added to the right panel, which lists all the selected promotion products. Then click ‘Confirm’.
For the effect, select a ‘Fixed price’ of $5, and have the promotion apply to the ‘Condition items’.
Create the promotion and add an image.
Now it’s time to create the campaign.
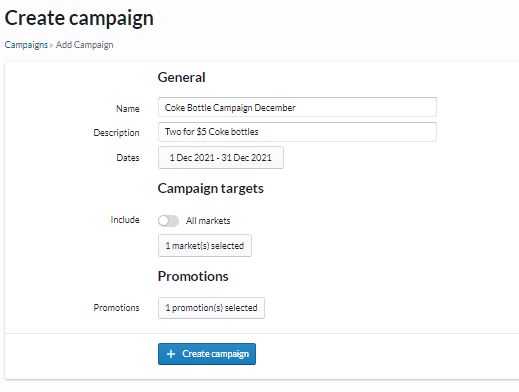
Once again, choose a name and description for the campaign. In this case, they align quite closely with the promotion that has already been made, but also include the time the campaign is running.
The campaign has been set to run for one month.
If you just want to run the promotion at one or more markets, unselect ‘All markets’ and click the ‘Markets selected’ button, which will open the market selection dialogue.
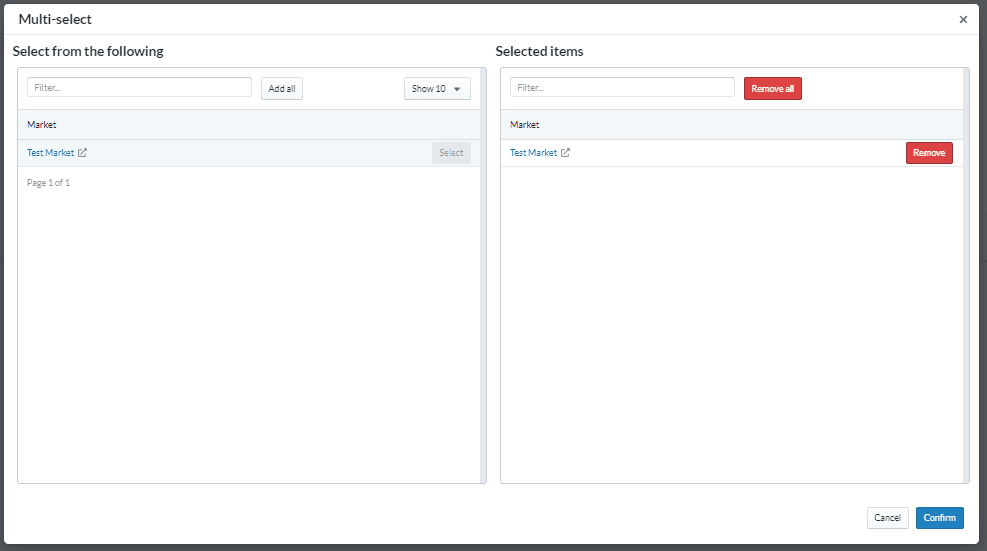
All the markets you have listed in Sentry will be on the left panel. Click the ‘Select’ button to the right of the markets you want, and they will be added to the right panel. These are all the markets the promotion will run at during the campaign.
For this example, select the Test Market and click ‘Confirm’.
Then select what promotion you want to apply; in this case it will be the ‘Coke bottle Promotion’ created earlier.
Click ‘Create campaign’ and it is finished; the promotion will automatically run at the selected kiosk for the set amount of time.
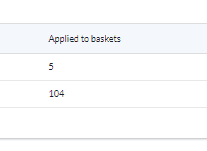
Note: You can see how many times the promotion was applied on the ‘Campaigns’ page on Sentry. There will be an ‘Applied to baskets’ metric to the right of each campaign.