
Overview #
This guide is intended to be used for new pickers/drivers/stockists using Sentry.
It assumes that a service run has already been created, and explains the next steps to complete the service run.
Downloading the mobile app #
Although it is possible to complete a service run using the web app, the normal and recommended practice is to use the SentryMobile app.
You can download the SentryMobile app here:
Android: https://play.google.com/store/apps/details?id=com.grt.sentry
iPhone: https://apps.apple.com/au/app/sentry/id1484751651
Once installed, log in to SentryMobile using your Sentry user email and password.
Selecting the service run #
Once logged in, you should see all service runs assigned to you.
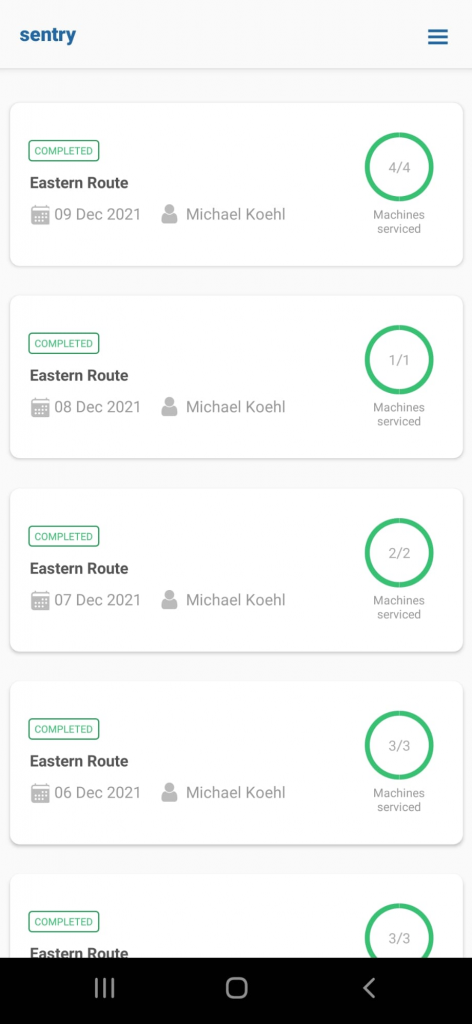
Tap on a service run to open the service run.
Service run detailed view #
After tapping a service run, you can see the details of the service run, including any machines and markets assigned to you. On this page, there are a number of convenience functions, including:
Pick list summary: The picklist summary aggregates all picklists into one. If you do not individually pick machines/markets, you may like to pick stock using the picklist summary.
Ticket summary: The ticket summary shows all tickets for the service run. The ticket summary is useful to see all the tickets that require resolution for the service run.
Recalculating picklists #
On the service run detailed view, there is a button that you can use to recalculate pick lists:

The recalculate picklist button will re-calculate stock required at the machines and markets in the service run.
If stock has sold between the time that the service run was created and pressing this button, new stock will be added to picklists.
When to recalculate pick lists
If you have not yet picked stock for the service run, you SHOULD recalculate pick lists to get the most up-to-date stock levels from machines/markets and generate the most accurate current picklist.
In general, you should always recalculate picklists prior to commencing picking stock.
If you ‘pick from the van/truck’, i.e. hold excess stock in your vehicle and do not pre-pick in your warehouse, then you should also recalculate picklists when arriving at a machine, because you will have available stock in your vehicle (and have not pre-picked stock).
When not to recalculate pick lists
Once a service run has been picked, you should NEVER recalculate your picklist.
Doing so will result in the system thinking that you are bring additional stock to a machine/market, but since your service run has already been picked, you won’t be. The result will be the system thinking that there is more stock in the machine/market than you actually used when restocking the machine/market.
Viewing an individual machine/market #
From the detailed service run view, you can click on an individual machine or market to view its detailed information.
The page will look like the following:
From this page, to complete servicing a machine/market, there are essentially 3 required steps to be taken:
- Pick stock required for the machine/market;
- Resolve any tickets for the machine/market;
- Confirm stock levels.
Picking stock #
To pick stock for a machine, click the ‘Pick list’ menu item on the detailed machine/market view.
The picklist shows products, the required pick amount, and a checkbox that can be used to indicate when a product has been picked.
When servicing a SentryMarkets micro market, picklists are displayed with stock separated by asset (fridge, shelf, etc).
Product checkbox
When using warehousing functionality in Sentry, it is required that the user checks checkboxes when picking stock.
Checkboxes result in stock being decremented from warehouses, so if they are not used, warehousing will not function correctly.
For companies that use Sentry without warehousing, it is not essential to use pick checkboxes, although it is generally useful to keep track of what has been picked.
Adjusting pick amounts
If you are run out of stock of a particular product when picking, you should adjust the picklist to reflect this. You can click on a single selection (or product) on the picklist and adjust the pick quantity on the dialog that pops up.
Important note: when servicing a machine or market, the number displayed on the picklist is the number that is added to the machine or market. Ticking the checkbox does not affect whether a products are added to a machine or market, so it is important that if a product is unavailable to be picked, that its number be set to zero (rather than not checking the checkbox).
Pick list settings
By clicking on the ‘Settings’ button, you can adjust options around how pick lists are displayed.
One commonly used setting is ‘Batch products’, which, if enabled, combines same products in the pick list into single pick items.
Resolving tickets #
The second main task for drivers/stockists in the SentryMobile app is to resolve tickets for the machine / market.
A service will not be marked as ‘Complete’ until all tickets are either resolved, or marked as being unable to be resolved.
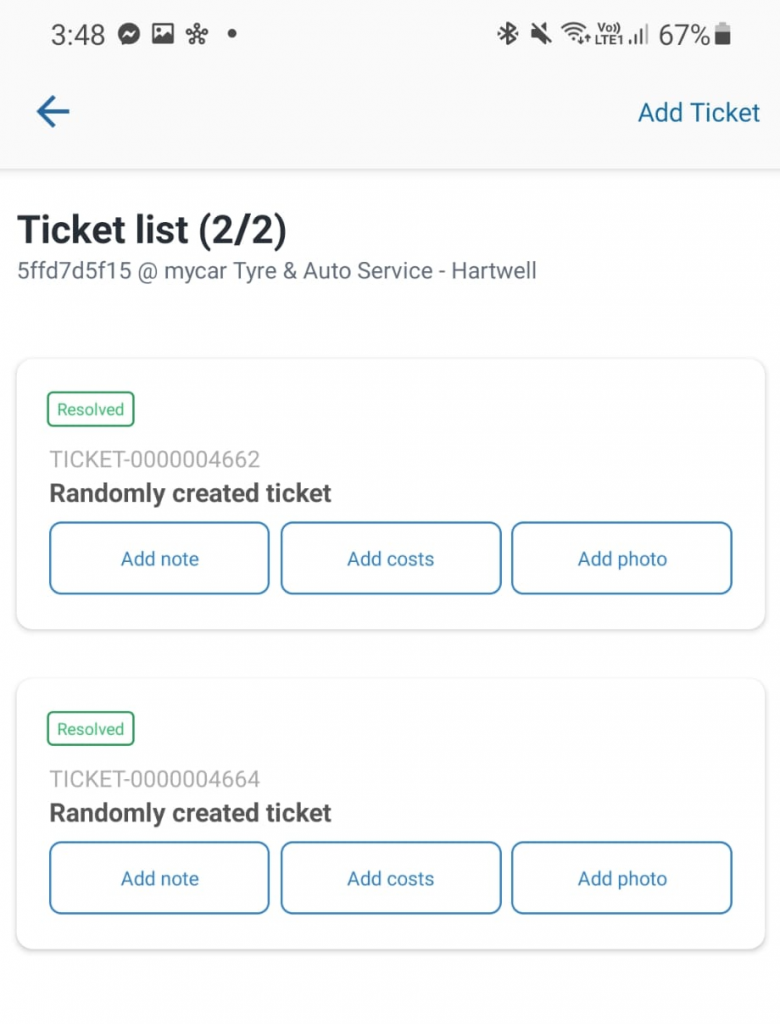
The following notes are worth bearing in mind when resolving tickets:
- Adding notes: You can add notes to a ticket by clicking the ‘Add note’ button.
- Adding costs: For companies that use 3rd party technicians, you may like to ask them to add their costs to a ticket by clicking ‘Add costs’.
- Adding photos: You can add photos to a ticket by clicking on the ‘Add photo’ button.
- Requirement to take photos: It is possible that a photo may be required in order to mark a ticket as resolved. In these cases, you must take a photo prior to being able to resolve the ticket.
If there is an issue at a machine or market, it is possible to add a new ticket at that moment by using the ‘Add ticket’ button in the top right hand corner of the screen.
Completing a restock #
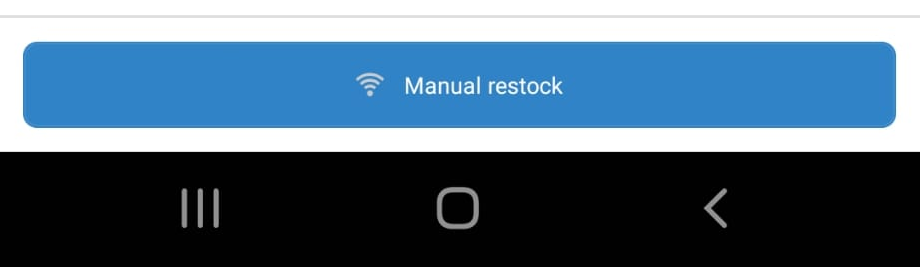
Once you have stocked the machine or market, you should take the one of the following next steps in order to inform Sentry that the restock has been completed:
- For dex-enabled machines, by sending a restock/fill dex; and
- For all other situations (non-dex machines, offline machines, and micro markets), you should press ‘Manual restock’ at the bottom of the page:
Sending a restock/fill dex
How to send a restock/fill dex will depend on the credit card/telemetry system installed on a vending machine.
For example:
- For CPI’s A5K modem, normally pressing ‘C’ will send a restock/fill dex.
- For Nayax modems, normally pressing any button on a reader will send a restock/fill dex.
- For Windcave LAN300 modems, pressing the ‘Restock’ button will send a restock/fill dex.
Sending a restock/fill dex from Nayax
Note: To make sure Nayax devices send fill/restock dex, for some Nayax devices, you may need to configure device features in Nayax so that button presses result in ‘DEX’. Any of the available options that include ‘DEX’ should work. We recommend the following settings:

Note: For VPOS touch units, it is best to directly contact Nayax to configure this to send fill/restock dex.
Effect of a restock
The primary effect of a restock is that the stock on a machine or markets picklist will be added to the machine or market in Sentry.
Completing a restock will mark the machine/market with the restock value as being ‘Complete’.
I sent a fill dex, but the service was not marked as ‘Complete’!
If you successfully sent a restock/fill dex to Sentry but the service remains incomplete, the most common cause for this is that the service run is planned on a day other than the current day.
In Sentry, for a restock to be successful, the machine/market service must be on the current day. Or, in other words, you cannot perform services that are planned for the past or future.
Adopting this approach allows you to plan multiple service runs in advance. That is, it would be possible to plan an entire weeks service runs at the start of the week – Sentry will know which service to mark ‘Complete’ based on the day that it receives a fill/restock dex.
I forgot to send a fill/restock dex!
If a stockist does not send a fill/restock dex, they can use the manual restock function. This should be avoided wherever possible, because obtaining up-to-date dex data by sending a fill dex at the time of service results in greater accuracy throughout Sentry.
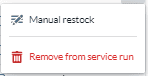
It is also possible to perform a manual restock from the web application by going to a detailed service run page, clicking the three dots on the right of a machine/market to be serviced, and then pressing ‘manual restock’:
Confirming stock levels #
Once you have completed a restock (whether by sending a fill dex or manually), it is possible to access the ‘Confirm stock levels’ page.
What is confirming stock levels?
Confirming stock levels is a stocktake process. It is used to verify and adjust the correct quantities of products in a machine/market after stocking the machine/market.
It is recommended that stock levels are confirmed on every service.
How do I confirm stock levels?
To confirm stock levels, perform a stocktake and count the stock in a machine/market, and while doing so, use the plus and minus ( – and + ) buttons to adjust stock levels in a machine.
Once all stock is counted, press the ‘Confirm stock levels’ button at the bottom of the page.
Note: because the pick list stock has been added to the machine/market at this stage, the numbers on the confirm stock levels page should be very accurate when first visiting the page. You should generally not have to make many changes when confirming stock levels.
Making adjustments when confirming stock levels
When confirming stock levels, it is possible to change the product, parlevel, price and capacity in a machine/market.
To do this click on a product/selection, and a dialog will pop up which allows you to set new values.
Note: If you cannot click on a product/selection, it is probably because the role permission for Add/Edit planograms is turned off for your role. This can be changed by changing the permission on your role: https://app.sentryvend.com/roles.
Advanced view
For a greater level of functionality, it is possible to turn on ‘Advanced view’ on the Confirm stock levels page.
This can be turned on by using the Settings button on that page, or by turning it on permanently in the User settings page.

In the advanced view, it is possible to not only confirm how much stock is in each selection, but also:
- Any spoiled stock which is removed from the machine/market; and
- Any other removed stock (the same as spoiled, except it was removed for another reason).
For example, if you:
- filled a selection to a 8 initially;
- removed 1 item as past by it’s use-by date;
- had 7 items remaining in the selection after the removal;
you would use the following values:
- Present: 7
- Spoiled: 1
- Removed: 0
The primary purpose of the advanced view is to accurately record all stock movements, and in particular, it is necessary to do this in order to accurately calculate any theft that may occur at a micro market.
What happens if somebody buys a product during the confirm stock levels process?
It is best practice to stop anybody from using a machine or market when stocking it, and when confirming stock levels. This will help to avoid any incorrect calculations.
However, if this cannot be avoided, and somebody makes a purchase during the stocktake process, the correct approach is:
- If the product that is purchased has already been counted, use the counted value.
- If the product that is purchased has not yet been counted, add this back to the final value.
To give an example:
- A stockist completes stocking a market, and presses the manual restock button in the mobile app.
- At this point, there are 8 waters in the market.
- While counting stock, a customer buys a water. There are now 7 waters left in the market.
- The correct value in this scenario to record as the confirmed number of waters is 8 (add back the 1 that was purchased).
The reason for this is that the confirm stock levels process compares the confirmed quantities against the quantities expected to be in the machine/market when the restock is processed.